

Introduction
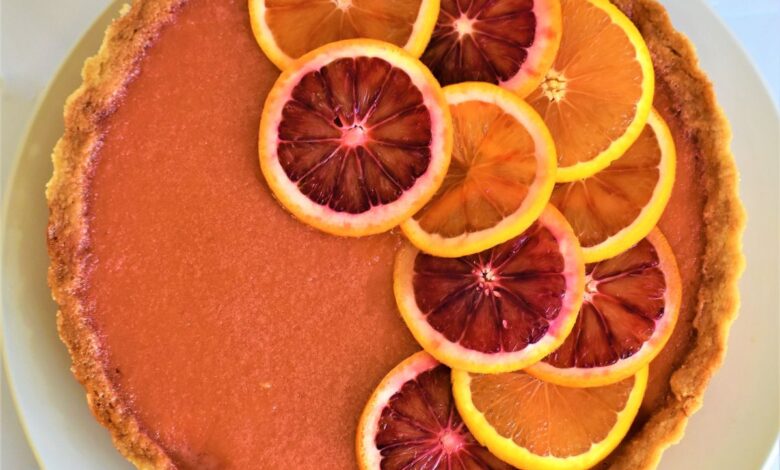
Get ready to brighten your day with these absolutely stunning Blood Orange Tarts with Custard! Imagine a buttery, crisp tart shell filled with a silky-smooth, vibrant custard. Each bite bursts with the sweet and tangy flavor of fresh blood oranges. It’s truly a delight for both the eyes and the palate, making any occasion feel extra special.
You might think such a beautiful dessert is difficult to make, but I promise it’s much simpler than it looks. We’ll use a few clever shortcuts to make the process enjoyable and stress-free. The custard comes together easily on the stovetop, and with ready-made tart shells, you’ll be assembling these beauties in no time. It’s all about fresh flavors and simple steps!
So, are you ready to impress your friends, family, or just treat yourself to something truly wonderful? Let’s dive into making these gorgeous Blood Orange Tarts. They are the perfect balance of creamy, zesty, and sweet, and I know you’ll love every single bite. Get your aprons on, and let’s create some magic!
Cooking Time & Prep Time
- Prep Time: 40 minutes
- Cooking Time: 25 minutes
- Total Time: 65 minutes
Small tip: To save time, you can prepare the blood orange juice and zest the day before. Store them in the fridge until ready to use.
Ingredients
This recipe makes 8 delightful individual tarts.
For the Tart Shells
- 8 pre-baked mini tart shells (about 3-4 inches in diameter)
For the Blood Orange Custard
- 1 cup (240ml) freshly squeezed blood orange juice (from about 3-4 blood oranges)
- Zest of 2 blood oranges
- 1/2 cup (100g) granulated sugar
- 3 large egg yolks
- 2 tablespoons (16g) cornstarch
- 1 1/2 cups (360ml) whole milk or half-and-half
- 1/4 cup (56g) unsalted butter, cut into cubes
- 1 teaspoon vanilla extract
- Pinch of salt
For the Garnish (Optional)
- 1 blood orange, thinly sliced
- Fresh mint leaves
- Powdered sugar, for dusting
Step-by-Step Instructions
-
Step 1: Prepare Your Blood Oranges
First, wash your blood oranges thoroughly. Carefully zest two of the blood oranges, making sure to avoid the bitter white pith. Then, juice enough blood oranges to get 1 cup of fresh juice. Strain the juice to remove any pulp or seeds.
Small tip: A microplane zester works best for getting fine zest.
-
Step 2: Whisk Dry Ingredients and Egg Yolks
In a medium bowl, whisk together the granulated sugar, egg yolks, cornstarch, and a pinch of salt until the mixture is smooth and pale. It should look like a thick, creamy paste. This is your custard base, ready for the warm milk.
Small tip: Whisking vigorously helps prevent lumps in your custard.
-
Step 3: Infuse the Milk
In a medium saucepan, combine the whole milk (or half-and-half) and the blood orange zest. Heat this mixture over medium heat until it just begins to simmer around the edges. Do not let it boil vigorously, as this can scorch the milk.
Small tip: Keep an eye on the milk; it can quickly boil over if left unattended.
-
Step 4: Temper the Egg Mixture
Slowly pour about half of the hot milk mixture into the egg yolk mixture, whisking constantly. This crucial step is called tempering and prevents the eggs from scrambling. Once combined, pour the tempered egg mixture back into the saucepan with the remaining hot milk.
Small tip: Pour slowly and whisk continuously to ensure the eggs heat up gently and evenly.
-
Step 5: Cook the Custard
Return the saucepan to medium heat and cook, whisking constantly, until the custard thickens significantly. It should be thick enough to coat the back of a spoon. This usually takes about 5-7 minutes. The custard will get very bubbly and then become glossy.
Small tip: Continue whisking even when it starts to thicken to prevent scorching the bottom.
-
Step 6: Finish the Custard
Remove the saucepan from the heat. Stir in the cubed unsalted butter, fresh blood orange juice, and vanilla extract until everything is fully incorporated and smooth. The butter will melt into the warm custard, adding richness and shine.
Small tip: Taste a small amount of the custard at this stage and adjust sweetness if desired.
-
Step 7: Strain and Chill the Custard
For an extra-smooth custard, press it through a fine-mesh sieve into a clean bowl. This removes any bits of zest or potential tiny egg solids. Cover the surface of the custard directly with plastic wrap to prevent a skin from forming. Let it cool slightly on the counter, then refrigerate for at least 2 hours, or until thoroughly chilled and set.
Small tip: Chilling is essential for the custard to firm up properly and be easy to handle.
-
Step 8: Fill the Tart Shells
Once the custard is completely chilled and firm, give it a quick whisk to loosen it slightly. Spoon or pipe the blood orange custard evenly into your pre-baked mini tart shells. Fill them almost to the brim for a generous serving.
Small tip: A piping bag makes filling neat and easy, but a spoon works perfectly too.
-
Step 9: Garnish Your Tarts
Arrange thin slices of fresh blood orange on top of each tart. You can fan them out or place a single slice. Add a few fresh mint leaves for a pop of color and freshness. A light dusting of powdered sugar adds a delicate finishing touch.
Small tip: Garnish just before serving for the freshest look and taste.
-
Step 10: Serve and Enjoy!
Your beautiful Blood Orange Tarts are now ready to be served! They are best enjoyed chilled. These tarts are perfect for dessert, a special brunch, or an afternoon tea. Enjoy the vibrant flavors!
Small tip: Arrange them on a pretty platter for an extra impressive presentation.
Tips & Variations
- Gluten-Free Option: Easily make this recipe gluten-free by using certified gluten-free pre-baked tart shells. The custard itself is naturally gluten-free as long as cornstarch is used as the thickener.
- Vegan Option: For a delicious vegan version, use plant-based milk (like almond or oat milk), vegan butter, and a cornstarch-based egg replacer or additional cornstarch to thicken the custard. Ensure your tart shells are also vegan-friendly.
- Add More Goodness: While this is a dessert, you can add a sprinkle of toasted slivered almonds or chopped pistachios on top for a boost of healthy fats and a delightful crunch. Or, serve alongside a small bowl of fresh berries for extra fiber and antioxidants.
- Spicy Twist: For a subtle kick, add a tiny pinch of cayenne pepper or a small amount of finely grated fresh ginger to the milk when infusing it with the orange zest. This adds an unexpected warmth that complements the citrus beautifully.
- Other Citrus Flavors: Feel free to experiment with other citrus fruits! Meyer lemon, regular lemon, or even lime zest and juice can be substituted for the blood orange to create different vibrant flavor profiles.
Nutritional Information
Approximate values per serving (based on 8 servings):
- Calories: 310 kcal
- Protein: 6g
- Carbohydrates: 38g
- Fat: 17g
Note: These values are approximate and may vary depending on the specific brands and ingredients used.
Health Benefits
These Blood Orange Tarts aren’t just delicious; they also offer some wonderful health benefits thanks to their star ingredient!
Blood Oranges: These vibrant fruits are packed with Vitamin C, a powerful antioxidant that supports your immune system and promotes healthy skin. They also contain anthocyanins, which are the pigments that give blood oranges their beautiful red hue. Anthocyanins are known for their anti-inflammatory properties and can help protect cells from damage.
Eggs: The egg yolks in the custard contribute essential nutrients. They are a good source of protein, which is vital for muscle repair and growth. Eggs also provide B vitamins, which are crucial for energy production, and choline, important for brain health and metabolism.
Milk: Using whole milk or half-and-half provides calcium, which is essential for strong bones and teeth. Many milk products are also fortified with Vitamin D, which aids in calcium absorption and plays a role in immune function.
While this is a dessert, enjoying it in moderation allows you to savor the fresh, natural goodness of the blood oranges and other wholesome ingredients. It’s a delightful way to get a dose of beneficial vitamins and antioxidants.
Serving Suggestions
- Serve these tarts as a sophisticated dessert after a light meal, perhaps alongside a scoop of vanilla bean ice cream or a dollop of freshly whipped cream.
- They make a fantastic addition to a brunch spread or an elegant afternoon tea party, offering a bright and refreshing option.
- For a slightly different texture, try serving them with a side of plain Greek yogurt for a tangy contrast that also adds a bit of protein.
- Present them individually on small dessert plates for a truly professional and inviting look.
Storage Tips
Store any leftover Blood Orange Tarts in an airtight container in the refrigerator. They will keep well for up to 3-4 days, maintaining their delicious flavor and texture. Freezing is generally not recommended for custard-filled tarts, as the custard can become grainy or separate upon thawing. These tarts are best enjoyed chilled, so no reheating is necessary; simply take them out of the fridge and serve.
Conclusion
There you have it – a recipe for Blood Orange Tarts with Custard that is as beautiful to look at as it is delicious to eat! These tarts truly capture the essence of fresh, vibrant blood oranges in a creamy,




