

Introduction
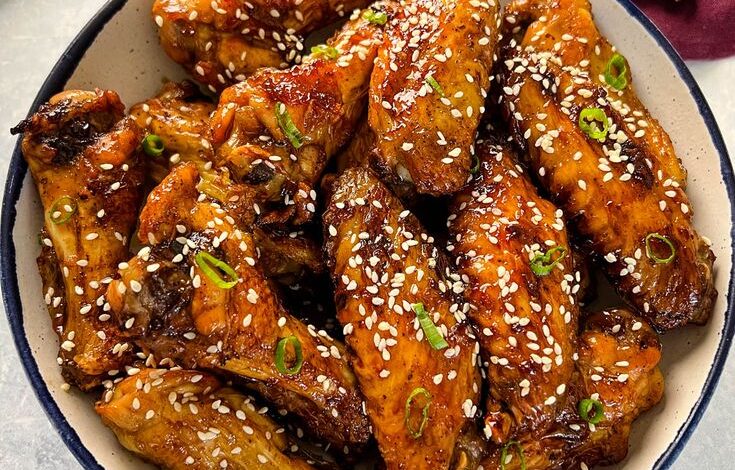
Get ready to discover a truly delightful dish that will become a staple in your kitchen: Baked Teriyaki Chicken! This recipe brings together tender, juicy chicken with a rich, sweet, and savory homemade teriyaki sauce. It’s a flavor explosion that perfectly balances umami notes with a hint of sweetness, creating an irresistible meal for any day of the week.
What makes this dish so special is how incredibly easy and quick it is to prepare. Forget complicated steps or long hours in the kitchen. With simple ingredients and straightforward instructions, you can have a restaurant-quality meal on your table with minimal effort. The oven does most of the work, allowing you to relax while your kitchen fills with the most amazing aromas.
Whether you’re a seasoned cook or just starting your culinary journey, this Baked Teriyaki Chicken recipe is designed for success. It’s perfect for busy weeknights, meal prep, or even entertaining guests. So, grab your apron, gather your ingredients, and let’s create some magic together!
Cooking Time & Prep Time
- Prep Time: 15 minutes
- Cooking Time: 25-30 minutes
- Total Time: 40-45 minutes
Small tip: You can prepare the teriyaki sauce a day ahead and store it in the fridge to cut down on prep time even further!
Ingredients
This recipe makes 4 generous servings.
For the Chicken
- 1.5 pounds (about 680g) boneless, skinless chicken thighs or breasts, cut into 1-inch pieces
- 1 tablespoon olive oil
- Salt and freshly ground black pepper to taste
For the Homemade Teriyaki Sauce
- 1/2 cup (120ml) low-sodium soy sauce
- 1/4 cup (60ml) water
- 3 tablespoons honey (or brown sugar)
- 1 tablespoon rice vinegar
- 1 teaspoon sesame oil
- 2 cloves garlic, minced
- 1 tablespoon fresh ginger, grated
- 1 tablespoon cornstarch
- 2 tablespoons cold water (for cornstarch slurry)
For the Garnish (Optional)
- 1 tablespoon sesame seeds
- 2 green onions, thinly sliced
Step-by-Step Instructions
-
Step 1: Prepare the Chicken
Preheat your oven to 400°F (200°C). Line a baking sheet with parchment paper for easy cleanup. Pat the chicken pieces dry with paper towels. Toss the chicken with olive oil, salt, and pepper in a medium bowl. This helps the chicken brown nicely and stay juicy.
Small tip: Patting the chicken dry is crucial for achieving a good sear and crispy texture.
-
Step 2: Make the Teriyaki Sauce
In a small saucepan, combine the soy sauce, 1/4 cup water, honey, rice vinegar, sesame oil, minced garlic, and grated ginger. Whisk everything together until well combined. Heat the mixture over medium heat, bringing it to a gentle simmer.
Small tip: Fresh ginger and garlic make a big difference in flavor, so try not to use powdered if possible.
-
Step 3: Thicken the Sauce
In a small separate bowl, whisk together the cornstarch and 2 tablespoons of cold water to create a smooth slurry. Once the teriyaki sauce in the saucepan is simmering, slowly pour in the cornstarch slurry while whisking constantly. Continue to whisk for 1-2 minutes until the sauce thickens to your desired consistency. It should be thick enough to coat the back of a spoon.
Small tip: Make sure the water for the slurry is cold; hot water can cause the cornstarch to clump.
-
Step 4: Coat the Chicken
Pour about half of the thickened teriyaki sauce over the seasoned chicken pieces in the bowl. Toss the chicken gently to ensure every piece is evenly coated. Reserve the remaining sauce for basting and serving. This initial coating will infuse the chicken with flavor as it bakes.
Small tip: Don’t use the sauce that touched raw chicken for serving unless it has been boiled again for several minutes. It’s safer to reserve separate sauce for serving.
-
Step 5: Bake the Chicken
Arrange the coated chicken pieces in a single layer on the prepared baking sheet. Make sure not to overcrowd the pan; leave a little space between each piece for even cooking. Bake for 15 minutes.
Small tip: An overcrowded pan will steam the chicken instead of baking it, preventing a nice caramelized exterior. Use two baking sheets if needed.
-
Step 6: Baste and Finish Baking
After 15 minutes, remove the baking sheet from the oven. Brush the chicken generously with some of the reserved teriyaki sauce. Return the chicken to the oven and continue baking for another 10-15 minutes, or until the chicken is cooked through and lightly caramelized. The internal temperature should reach 165°F (74°C).
Small tip: For extra caramelization, you can briefly broil the chicken for the last 2-3 minutes, but watch it carefully to prevent burning.
-
Step 7: Garnish and Serve
Once baked, remove the chicken from the oven. Let it rest for a few minutes before serving. Drizzle with any remaining reserved teriyaki sauce, and sprinkle with sesame seeds and sliced green onions for a fresh, vibrant finish. Serve hot and enjoy!
Small tip: Resting the chicken allows the juices to redistribute, resulting in more tender and flavorful meat.
Tips & Variations
- Gluten-Free Option: Easily make this recipe gluten-free by using tamari instead of regular soy sauce. All other ingredients are naturally gluten-free!
- Vegan/Vegetarian Option: Swap the chicken for firm tofu or tempeh. Press the tofu well before cutting and marinating for best results. You can also use large portobello mushroom caps.
- Add More Vegetables: For a complete meal, add broccoli florets, bell pepper strips, or snap peas to the baking sheet during the last 10-15 minutes of baking. They will cook alongside the chicken and soak up the delicious sauce.
- Spicy Version: If you love a little heat, add 1/2 teaspoon of red pepper flakes or a dash of sriracha to the teriyaki sauce while it simmers. Adjust to your preferred level of spiciness.
- Zesty Flavor Boost: A squeeze of fresh lime juice over the finished chicken just before serving can add a bright, zesty counterpoint to the sweet and savory flavors.
- Grilled Teriyaki Chicken: Instead of baking, you can grill the chicken. Marinate the chicken in half of the sauce for at least 30 minutes, then grill until cooked through, basting with the reserved sauce during the last few minutes.
Nutritional Information
Approximate values per serving (based on 4 servings):
- Calories: 380-420
- Protein: 35-40g
- Carbohydrates: 25-30g
- Fat: 15-20g
Note: Values may vary depending on specific ingredients used, such as chicken cut (breast vs. thigh) and the amount of honey/sugar in the sauce.
Health Benefits
This Baked Teriyaki Chicken dish is not just delicious, but it also offers several health benefits thanks to its wholesome ingredients.
Lean Protein Power: Chicken, especially boneless, skinless chicken, is an excellent source of lean protein. Protein is essential for building and repairing tissues, supporting muscle growth, and keeping you feeling full and satisfied. It also plays a vital role in enzyme and hormone production.
Immune-Boosting Ginger and Garlic: Fresh ginger and garlic are culinary powerhouses. Ginger is known for its anti-inflammatory properties and can aid digestion, while garlic is rich in antioxidants and compounds that support immune function and heart health. They add incredible flavor without extra calories.
Essential Minerals: Chicken provides important minerals like selenium, which is a powerful antioxidant, and phosphorus, crucial for bone health and energy metabolism. The sesame seeds used for garnish also contribute healthy fats and minerals like calcium and magnesium.
Balanced Energy: While the sauce contains some natural sugars from honey, it’s balanced with savory soy sauce and nutrient-dense chicken. This combination provides sustained energy without a sharp spike in blood sugar, especially when paired with whole grains or vegetables.
Serving Suggestions
- Classic Pairing: Serve over a bed of fluffy white or brown rice to soak up all that delicious teriyaki sauce.
- Healthy & Fresh: Pair with steamed broccoli, roasted asparagus, or a simple green salad for a light and refreshing meal.
- Noodle Bowl: Toss with cooked udon or soba noodles and some stir-fried vegetables for a complete noodle bowl experience.
- Meal Prep Power: This recipe is fantastic for meal prep! Divide the cooked chicken and your chosen sides into individual containers for quick, healthy lunches or dinners throughout the week.
- Lettuce Wraps: Shred the chicken and serve it in crisp lettuce cups with shredded carrots and a sprinkle of chopped peanuts for a fun, low-carb option.
Storage Tips
Leftover Baked Teriyaki Chicken can be stored in an airtight container in the refrigerator for up to 3-4 days. It reheats beautifully in the microwave or a skillet over medium heat until warmed through. You can also freeze the cooked chicken for up to 2-3 months. Thaw overnight in the refrigerator before reheating. The sauce might thin slightly after freezing and thawing, but the flavor will remain delicious.
Conclusion
There you have it – a truly fantastic recipe for Baked Teriyaki Chicken that is sure to impress everyone at your table. Its perfect blend of sweet and savory flavors, combined with tender chicken, makes it an instant family favorite. Plus, the ease of preparation means you can enjoy a wholesome, homemade meal without any stress.
We absolutely encourage you to give this recipe a try. You’ll be amazed at how simple it is to create such a flavorful and satisfying dish from scratch. It’s a wonderful way to bring delicious, healthy food into your home without compromising on taste.
So go ahead, whip up a batch of this incredible Baked Teriyaki Chicken tonight. Share it with your loved ones, gather around the table, and savor every single bite. Happy cooking!




