

Introduction
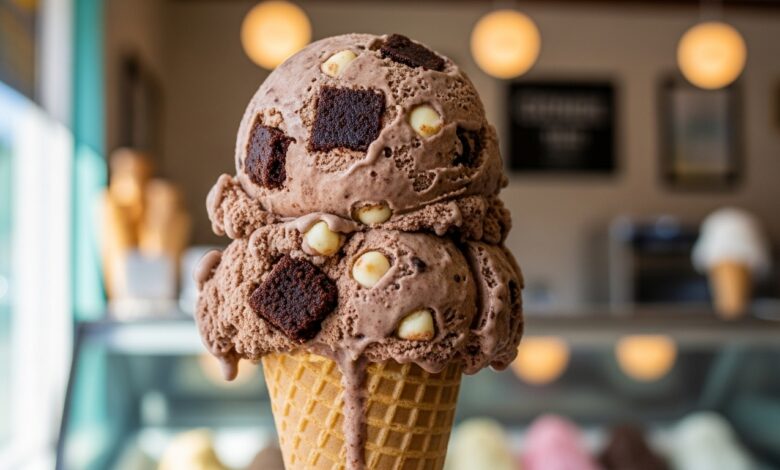
Why choose between a gooey brownie and a chocolate chip cookie when you can have both swirled into creamy ice cream? Cookies & Brownie Ice Cream is the ultimate dessert mashup—it combines the best of all worlds into one irresistible frozen treat. This recipe is special because it uses a simple, no-churn base, meaning you don’t need an ice cream maker! With minimal effort, you get dense, fudgy brownie chunks and sweet, chewy cookie dough pieces layered throughout a rich chocolate ice cream base. It’s perfect for parties, family treats, or whenever you need a major dose of comfort. Get ready to scoop up some pure happiness!
Cooking Time & Prep Time
- Prep Time: 30 minutes (Making brownie pieces and cookie dough)
- Cook Time (Baking Brownies): 20–25 minutes
- Chill Time (Dough & Base): 6 hours (or overnight)
- Freezing Time (Hardening): 4–6 hours
- Total Active Time: About 55 minutes
Ingredients
For the Ice Cream Base (No-Churn):
- 2 cups cold heavy cream (whipping cream)1
- 1 (14-ounce) can sweetened condensed milk2
- 1/3 cup unsweetened cocoa powder (Dutch-processed is best for rich color)3
- 1 teaspoon vanilla extract4
- Pinch of salt
For the Mix-Ins:
- 1 cup pre-made, fudgy brownies, cut into 1/2-inch pieces
- 1 cup edible chocolate chip cookie dough pieces (make sure the flour is heat-treated!)
- 1/2 cup mini chocolate chips (optional, for extra crunch)
Step-by-Step Instructions
Part 1: Prepare the Mix-Ins (Do this ahead of time!)
- Prepare Brownie Chunks: Bake your favorite fudgy brownie recipe and let it cool completely. Cut the brownies into small, 1/2-inch bite-sized pieces.5 Set aside.
- Prepare Cookie Dough: Use your favorite recipe for edible cookie dough, making sure the flour is heat-treated (baked/microwaved briefly) to kill any raw bacteria, as it will not be baked in the ice cream. Roll the dough into small, pea-sized balls or simply pinch off small chunks.
- Freeze Mix-Ins: Place the brownie and cookie dough pieces on a plate or tray and freeze for at least 30 minutes. This prevents them from melting into the soft ice cream base.
Part 2: Create the Chocolate Ice Cream Base
- Whisk Base Flavor: In a medium bowl, whisk together the sweetened condensed milk, cocoa powder, vanilla extract, and salt until the cocoa powder is completely dissolved and the mixture is smooth and chocolatey.
- Whip the Cream: Pour the 2 cups of cold heavy cream into a large mixing bowl.6 Using an electric mixer, beat the cream on medium-high speed until stiff peaks form.7 The cream should stand up straight on the beater when lifted.
- Fold Together: Gently pour the chocolate-condensed milk mixture over the whipped cream. Using a large spatula, gently fold the two mixtures together until they are just combined and uniform in color. Be careful not to overmix, as this will deflate the air and make the ice cream icy.
Part 3: Assemble and Freeze
- Layer and Fold: Transfer the chocolate ice cream mixture into a large, freezer-safe container (a metal loaf pan works well).8 Gently fold in the frozen brownie chunks, frozen cookie dough pieces, and mini chocolate chips (if using).
- Harden: Press a piece of plastic wrap directly onto the surface of the ice cream to keep ice crystals away. Cover the container with a lid. Place the ice cream in the freezer for a minimum of 6 hours, or preferably overnight, until it is firm and ready to scoop.9
Tips & Variations
- Vegan/Dairy-Free: This recipe is naturally gluten-free. For a vegan version, use thick full-fat coconut cream (from cans chilled overnight) instead of heavy cream, and sweetened condensed coconut milk.10 Ensure the brownies, cookie dough, and chocolate chips are also dairy-free/vegan.
- Caramel Swirl: For even more richness, drizzle 1/2 cup of salted caramel sauce (chilled) throughout the layers as you assemble the ice cream before freezing.
- Flavor Swap: You can use a vanilla ice cream base instead of chocolate! Simply omit the cocoa powder from the condensed milk mixture.
- Toppings: Use crushed chocolate sandwich cookies (like Oreos) instead of the brownie pieces for a “Cookies and Cream” twist.
Nutritional Information
This is a rich, satisfying dessert. The approximate nutrition facts for a 1/2 cup serving (based on full-fat dairy and the standard mix-ins):
| Nutrient | Approximate Amount (per 1/2 cup serving) |
| Calories | 280–350 |
| Protein | 4–6g |
| Total Fat | 15–20g |
| Carbohydrates | 35–45g |
Health Benefits
When enjoyed as a treat, this ice cream offers a few simple mood-boosting benefits. The dark chocolate and cocoa powder contain antioxidants (flavanols) that can support heart health and are known to trigger the release of “feel-good” hormones in the brain.11 The dairy provides Calcium for strong bones and Protein for energy.12 The greatest benefit is the joy of a homemade dessert that perfectly satisfies your deepest chocolate cravings!
Serving Suggestions
Serve this magnificent ice cream in cones or bowls, straight from the freezer.
- Ultimate Sundae: Top a scoop with warm hot fudge sauce, whipped cream, and a maraschino cherry.
- Milkshake: Blend a few scoops with a splash of milk for an extra thick, rich milkshake.
- Pairing: Serve alongside a fresh fruit platter to cut the richness with some tartness.
Storage: Store leftovers in a sealed container in the coldest part of your freezer for up to 1 month.
Conclusion
You now have the simple, no-fail method for creating the ultimate mashup dessert: Cookies & Brownie Ice Cream! It is a delicious, creamy, and indulgent treat that is guaranteed to be the star of any gathering. The effort is minimal, but the reward is immense. Go ahead—mix, fold, and freeze your way to ice cream perfection and share the sweet, chocolaty joy with your loved ones!




