

Introduction
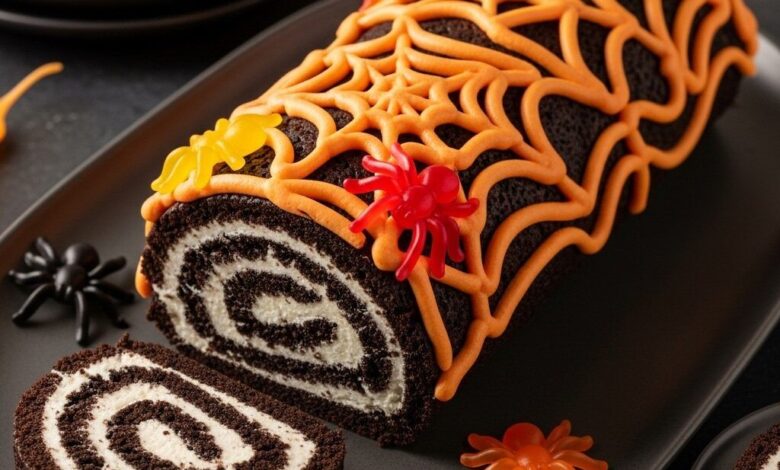
Get ready for a treat that’s both spooky and sweet! This Halloween Oreo Roll is an absolute delight. It’s a no-bake wonder that combines the classic crunch of Oreos with a creamy, dreamy filling. Every bite is a perfect blend of textures and flavors, making it a truly special dessert for the season.
The best part? This recipe is incredibly easy and quick to make. You don’t need any special baking skills or fancy equipment. Just a few simple ingredients and a little bit of time will transform ordinary cookies into an extraordinary Halloween masterpiece. It’s perfect for busy ghoul-friends and monster-moms alike!
So, gather your ingredients and let’s whip up some magic. This Halloween Oreo Roll will impress your guests and satisfy every sweet tooth. It’s guaranteed to bring smiles and maybe a few happy “boos” to your festive table. You simply have to try it!
Cooking Time & Prep Time
- Prep Time: 25 minutes
- Chill Time: 1 hour 30 minutes
- Total Time: 1 hour 55 minutes
Small tip: The chill time is crucial for the roll to set properly. Don’t rush it for the best results!
Ingredients
This recipe makes approximately 8-10 servings.
- For the Oreo Cookie Base:
- 36 Oreo cookies (1 standard family-size package)
- 1/2 cup (113g) unsalted butter, melted
- 2 tablespoons cream cheese, softened
- For the Cream Cheese Filling:
- 8 ounces (226g) cream cheese, softened
- 1 cup (120g) powdered sugar, sifted
- 1 teaspoon vanilla extract
- For Decoration:
- 2 tablespoons Halloween sprinkles
- Optional: Melted white chocolate or dark chocolate for drizzling
Step-by-Step Instructions
-
Step 1: Crush the Oreos
Place all 36 Oreo cookies into a food processor. Pulse until fine crumbs form. If you don’t have a food processor, you can place them in a large Ziploc bag and crush them with a rolling pin. Make sure there are no large chunks left.
Small tip: Crushing them finely ensures a smooth “dough” for rolling.
-
Step 2: Prepare the Cookie Dough
In a medium bowl, combine the Oreo crumbs, melted butter, and softened cream cheese. Mix well with a spoon or your hands until a thick, uniform “dough” forms. It should be moist enough to hold together when pressed.
Small tip: Ensure the cream cheese is truly softened for easier mixing.
-
Step 3: Roll Out the Dough
Lay out a large piece of parchment paper or plastic wrap on a clean surface. Transfer the Oreo mixture onto it. Place another piece of parchment paper or plastic wrap on top. Using a rolling pin, roll the mixture into a rectangle, about 1/4-inch thick and approximately 12×9 inches in size.
Small tip: Rolling between two sheets prevents sticking and makes cleanup a breeze.
-
Step 4: Make the Cream Cheese Filling
In a separate bowl, beat the softened cream cheese, sifted powdered sugar, and vanilla extract together. Use an electric mixer on medium speed until the mixture is smooth and creamy. Scrape down the sides of the bowl as needed.
Small tip: Sifting the powdered sugar prevents lumps in your filling.
-
Step 5: Spread the Filling
Carefully remove the top layer of parchment paper from the Oreo base. Evenly spread the cream cheese filling over the entire surface of the Oreo rectangle. Leave a small border (about half an inch) around the edges. This helps prevent the filling from squeezing out when rolling.
Small tip: Use an offset spatula for the smoothest spread.
-
Step 6: Roll It Up
Starting from one of the longer sides, carefully roll the Oreo base and filling into a tight log. Use the bottom layer of parchment paper to help you lift and roll. Roll it as tightly as you can without tearing the cookie layer.
Small tip: Roll slowly and evenly to prevent cracks and keep the log uniform.
-
Step 7: Chill the Roll
Once rolled, wrap the log tightly in the parchment paper or plastic wrap. Place it in the refrigerator for at least 1 hour and 30 minutes. Chilling allows the roll to firm up, making it easier to slice and ensuring the filling is perfectly set.
Small tip: A longer chill (up to 3 hours) will result in an even firmer, easier-to-slice roll.
-
Step 8: Decorate and Serve
After chilling, unwrap the Oreo roll. Place it on a serving platter. Sprinkle generously with Halloween sprinkles over the top. If desired, drizzle with melted white or dark chocolate for extra flair. Slice into 1-inch thick rounds and serve immediately. Enjoy your spooky treat!
Small tip: Use a sharp knife for clean slices, wiping it between cuts if needed.
Tips & Variations
- Gluten-Free Option: Easily make this recipe gluten-free by using gluten-free Oreo cookies. The rest of the ingredients are naturally gluten-free.
- Vegan Option: To make this dessert vegan, use vegan Oreo cookies, vegan cream cheese, and a plant-based butter alternative. Most powdered sugars are vegan, but always check the label.
- Extra Flavor Boost: For a richer flavor, add 1/4 cup of mini chocolate chips or finely chopped nuts (like pecans or walnuts) to the cream cheese filling.
- Spooky Spice Version: For a subtle, warming “spooky” kick, add 1/4 teaspoon of ground cinnamon or a tiny pinch of chili powder to the cream cheese filling. This creates an unexpected, delightful twist.
- Different Cookie Base: Experiment with other cookie varieties! Try Nilla Wafers for a vanilla-flavored roll, or ginger snaps for a spicier, autumnal twist. Adjust butter if needed for different cookie textures.
Nutritional Information
Approximate values per serving (based on 8 servings):
- Calories: 480 kcal
- Protein: 4g
- Carbohydrates: 58g
- Fat: 27g
Please note: These values are approximate and may vary depending on the specific brands and quantities of ingredients used.
Health Benefits
While this Halloween Oreo Roll is primarily a delicious treat, some of its ingredients do offer a few benefits when consumed in moderation.
Cream cheese, for instance, provides a source of calcium, which is essential for strong bones and teeth. It also contains some vitamin A, important for vision and immune function, and a small amount of protein.
Butter, when used in moderation, contributes fat-soluble vitamins like Vitamin A and E. These vitamins play roles in immune health and antioxidant protection within the body.
Vanilla extract, though used in small quantities, contains antioxidants that can help combat free radicals in the body. It also adds a wonderful aromatic quality that can enhance the enjoyment of your food.
Ultimately, the greatest “health benefit” of this delightful dessert might be the joy it brings! Sharing homemade treats with loved ones can boost mood and foster connection, contributing to overall mental well-being. Remember, balance and moderation are key to a healthy lifestyle.
Serving Suggestions
- Serve slices of the Halloween Oreo Roll alongside a tall glass of cold milk or a warm cup of coffee for the perfect pairing.
- For a more elaborate dessert, serve individual slices with a scoop of vanilla ice cream or a dollop of whipped cream.
- This roll makes a fantastic centerpiece for any Halloween party dessert table. It’s best enjoyed as a standalone dessert or part of a fun sweet spread.
- Meal Prep Idea: This dessert is perfect for making ahead! Prepare the roll up to 2 days in advance and keep it tightly wrapped in the fridge until you’re ready to serve.
Storage Tips
Store any leftover Halloween Oreo Roll slices in an airtight container in the refrigerator for up to 3-5 days. It tastes just as good, if not better, the next day! You can also freeze the entire roll (or individual slices) wrapped tightly in plastic wrap and then foil for up to 1 month. Thaw in the refrigerator overnight before serving. This dessert is served cold, so no reheating is required.
Conclusion
There you have it – a truly enchanting and utterly delicious Halloween Oreo Roll! This recipe proves that you don’t need to be a master baker to create something spectacular. It’s simple, fun, and the results are always a crowd-pleaser. The combination of crunchy cookie, smooth cream, and festive sprinkles is simply irresistible.
So, why wait? Gather your ingredients and bring some spooky sweetness into your home. This Halloween Oreo Roll is the perfect treat to celebrate the season, whether you’re hosting a party or just enjoying a cozy night in.
Don’t forget to share your creations with family and friends! There’s nothing better than making and sharing delicious food. Happy Halloween, and happy rolling!




