

Introduction
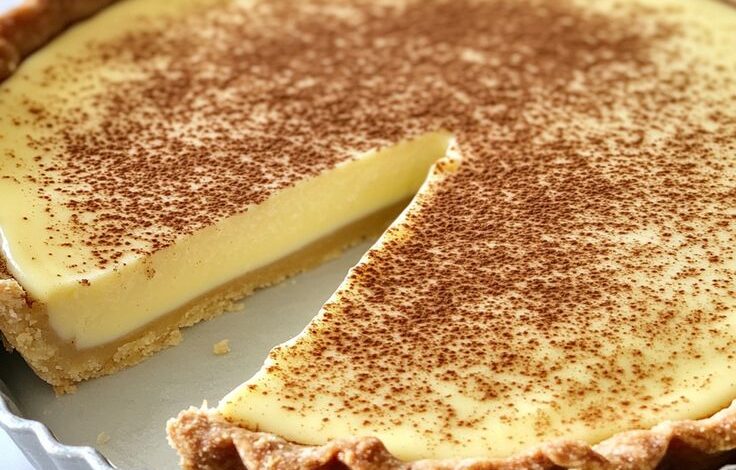
Get ready to discover a truly magical dessert from sunny South Africa: Milk Tart, or “Melktert” as it’s known in Afrikaans! This delightful treat features a delicate, buttery crust filled with a creamy, dreamy custard that’s subtly sweet and infused with vanilla. A final dusting of cinnamon makes it irresistible, offering a comforting warmth with every single bite.
You might think baking a show-stopping dessert is complicated, but Milk Tart is surprisingly simple to make. With straightforward ingredients and easy-to-follow steps, even beginner bakers can achieve a perfectly smooth, wobbly custard that will impress everyone. It’s a wonderful recipe that doesn’t demand hours in the kitchen.
So, why not treat yourself and your loved ones to this incredible dessert? It’s the perfect sweet ending to any meal, a lovely afternoon tea companion, or just a comforting indulgence. Dive in and let’s bake some delicious Milk Tart together!
Cooking Time & Prep Time
- Prep Time: 30 minutes
- Cooking Time: 40 minutes
- Chilling Time: At least 2 hours (essential for setting)
- Total Time: Approximately 3 hours 10 minutes (including chilling)
Small tip: Prepare your pastry dough first and let it chill in the fridge while you gather your filling ingredients. This helps the butter firm up, making the crust flakier.
Ingredients
Makes 8 generous slices
For the Crust
- 1 ½ cups (180g) all-purpose flour
- ¼ cup (50g) granulated sugar
- Pinch of salt
- ½ cup (113g) unsalted butter, very cold and cubed
- 3-4 tablespoons ice water
For the Filling
- 4 cups (960ml) whole milk
- ½ cup (100g) granulated sugar
- 2 tablespoons unsalted butter
- 1 cinnamon stick (optional, for infusing milk)
- 1 teaspoon vanilla extract
- 3 large eggs
- ½ cup (60g) all-purpose flour
- ¼ cup (30g) cornstarch (cornflour)
For the Garnish
- 1-2 teaspoons ground cinnamon, for dusting
Step-by-Step Instructions
-
Step 1: Prepare the Crust Dough
In a large bowl, whisk together the flour, sugar, and salt. Add the cold, cubed butter to the flour mixture. Using your fingertips or a pastry blender, cut the butter into the flour until it resembles coarse crumbs with some pea-sized butter pieces remaining.
Small tip: Work quickly to prevent the butter from melting too much, which helps create a flaky crust.
-
Step 2: Form and Chill the Dough
Gradually add the ice water, one tablespoon at a time, mixing gently until the dough just comes together. Be careful not to overmix. Form the dough into a disc, wrap it tightly in plastic wrap, and refrigerate for at least 30 minutes.
Small tip: If the dough feels too sticky, add a tiny bit more flour. If too dry, a few drops more ice water.
-
Step 3: Press the Crust into the Pan
Preheat your oven to 350°F (175°C). On a lightly floured surface, roll out the chilled dough into a 12-inch circle. Carefully transfer the dough to a 9-inch pie dish or tart pan. Press it evenly into the bottom and up the sides, trimming any excess.
Small tip: For a neat edge, you can crimp the crust with your fingers or press a fork around the rim.
-
Step 4: Blind Bake the Crust
Line the crust with parchment paper and fill it with pie weights, dried beans, or rice. Blind bake for 15 minutes, then remove the paper and weights. Continue baking for another 5-7 minutes, until the crust is lightly golden. Remove from the oven and set aside.
Small tip: Blind baking prevents the crust from becoming soggy once the filling is added.
-
Step 5: Prepare the Milk Infusion
In a large saucepan, combine the milk, sugar, butter, and cinnamon stick (if using). Heat over medium heat, stirring occasionally, until the sugar dissolves and the butter melts. Do not bring to a boil. Remove the cinnamon stick and stir in the vanilla extract.
Small tip: Keep an eye on the milk to prevent it from scorching on the bottom of the pan.
-
Step 6: Create the Thickening Slurry
In a separate medium bowl, whisk together the eggs, flour, and cornstarch until smooth and no lumps remain. This creates a thick, pourable slurry that will thicken your custard.
Small tip: Ensure your whisking is thorough here; any lumps will show in the final custard.
-
Step 7: Temper and Combine the Filling
Slowly pour about a cup of the warm milk mixture into the egg slurry, whisking constantly. This “tempers” the eggs, preventing them from scrambling. Then, gradually pour the tempered egg mixture back into the saucepan with the remaining warm milk, whisking continuously.
Small tip: Whisk vigorously to fully incorporate the egg mixture and prevent lumps.
-
Step 8: Cook the Custard and Bake the Tart
Return the saucepan to medium-low heat and cook, whisking constantly, until the mixture thickens significantly and coats the back of a spoon, about 5-8 minutes. It should be very thick. Pour the hot custard into the pre-baked pie crust. Return the tart to the oven and bake for another 10-15 minutes, or until the edges are set but the center still has a slight wobble.
Small tip: A slight wobble in the center is perfect; the custard will continue to set as it cools. Overbaking can make it rubbery.
-
Step 9: Cool and Garnish
Remove the Milk Tart from the oven and let it cool completely on a wire rack. This can take several hours. Once fully cooled, refrigerate for at least 2 hours, or preferably overnight, until thoroughly chilled and set. Just before serving, dust generously with ground cinnamon.
Small tip: Chilling is crucial for the custard to firm up properly, so don’t rush this step!
Tips & Variations
- Gluten-Free Option: Use a gluten-free all-purpose flour blend for the crust and ensure your cornstarch is certified gluten-free. The filling itself is naturally gluten-free if you use a GF flour blend for thickening.
- Vegan Option: Replace dairy milk with a full-fat plant-based milk (like oat or soy milk), use vegan butter, and substitute eggs with a flax egg (1 tbsp ground flaxseed + 3 tbsp water per egg) or commercial egg replacer, adjusting liquid as needed. You may need to increase cornstarch slightly for thickening.
- Healthier Crust: For a slightly healthier twist, try using half whole wheat pastry flour and half all-purpose flour in your crust. You can also reduce the sugar in the crust slightly.
- Flavor Boosts: Add a teaspoon of orange zest to the milk while it’s heating for a lovely citrus note. A pinch of cardamom or a tiny bit of almond extract can also add a unique twist to the custard.
- Different Toppings: While cinnamon is classic, you can also dust with cocoa powder, fine coconut flakes, or a drizzle of caramel sauce for a different presentation and flavor.
Nutritional Information
Approximate values per serving (based on 8 servings):
- Calories: 380
- Protein: 9g
- Carbohydrates: 45g
- Fat: 28g
Please note: These values are approximate and may vary depending on the specific brands and exact quantities of ingredients used.
Health Benefits
While Milk Tart is a delicious treat, some of its key ingredients offer beneficial nutrients:
- Milk: A powerhouse of calcium and Vitamin D, which are essential for strong bones and teeth. It also provides high-quality protein, crucial for muscle repair and growth.
- Eggs: Packed with complete protein, eggs are a great source of B vitamins (like B12, riboflavin, and folate) vital for energy production and brain health. They also contain choline, important for memory and mood.
- Cinnamon: This warming spice is known for its powerful antioxidant properties, which help protect your body from damage. It may also have anti-inflammatory effects and contribute to blood sugar regulation.
- Flour (in moderation): Provides carbohydrates, which are the body’s primary source of energy, fueling your brain and muscles.
Enjoying Milk Tart as an occasional dessert means you can savor these benefits along with




