Introduction
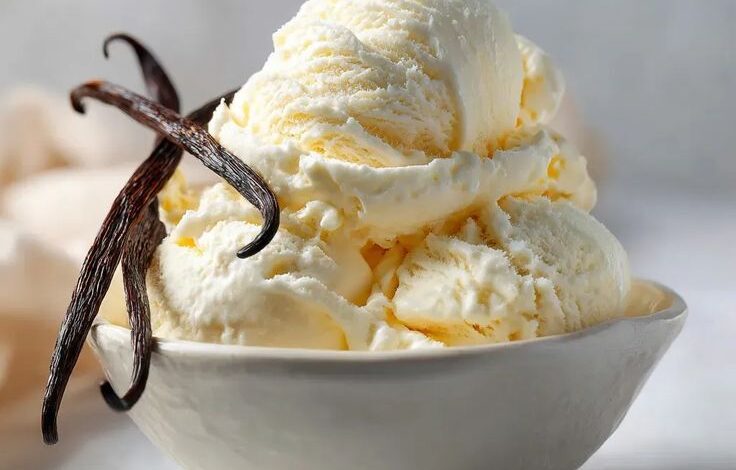
Imagine a scoop of pure bliss, melting slowly on your tongue. That’s exactly what you get with our Classic Vanilla Bean Ice Cream! This isn’t just any vanilla ice cream; it’s a creamy, dreamy masterpiece infused with the rich, aromatic speckles of real vanilla bean. It’s the perfect balance of sweet and comforting, a timeless treat that truly shines on its own or as a delightful companion to your favorite desserts.
You might think making ice cream from scratch is complicated, but I promise you, it’s surprisingly simple. While there’s a bit of chilling time involved, the active cooking steps are straightforward and incredibly rewarding. We’re talking about a few basic ingredients transformed into something truly spectacular with just a little bit of love and attention. No fancy techniques, just pure, unadulterated ice cream magic.
Get ready to impress your taste buds and everyone you share it with! This recipe will guide you through every step, ensuring a smooth, velvety texture and an unforgettable vanilla flavor. So, grab your apron, dust off that ice cream maker, and let’s create some incredible homemade Classic Vanilla Bean Ice Cream together. You won’t regret it!
Cooking Time & Prep Time
- Prep Time: 25 minutes
- Cooking Time: 15 minutes
- Chilling Time: 4 hours (minimum, preferably overnight)
- Churning Time: 20-30 minutes
- Freezing Time: 2-4 hours
- Total Time: Approximately 7-9 hours (mostly passive chilling and freezing)
Small tip: The chilling time is crucial for the best texture and flavor. Don’t rush this step! An overnight chill truly makes a difference.
Ingredients
This recipe makes approximately 8 servings (about 1.5 quarts).
- 2 cups (480ml) heavy cream
- 1 cup (240ml) whole milk
- ¾ cup (150g) granulated sugar
- ½ teaspoon fine sea salt
- 1 vanilla bean, split lengthwise and scraped, or 1 tablespoon vanilla bean paste
- 5 large egg yolks
Step-by-Step Instructions
-
Step 1: Steep the Vanilla
In a medium saucepan, combine the heavy cream, whole milk, granulated sugar, and sea salt. If using a vanilla bean, add both the scraped seeds and the pod to the mixture. Heat over medium heat, stirring occasionally, until the sugar is dissolved and the mixture just begins to simmer around the edges. Do not boil.
Small tip: If using vanilla bean paste, you can add it in Step 3 for maximum flavor.
-
Step 2: Temper the Egg Yolks
While the cream mixture heats, whisk the egg yolks in a separate medium bowl until they are light yellow and slightly thickened. Once the cream mixture is hot, slowly ladle about ½ cup of the hot liquid into the egg yolks, whisking constantly. This warms the yolks gently and prevents them from scrambling.
Small tip: Whisking continuously is key here to ensure the yolks temper smoothly and don’t cook.
-
Step 3: Cook the Custard Base
Pour the tempered egg yolk mixture back into the saucepan with the remaining cream mixture. If you’re using vanilla bean paste, add it now. Continue to cook over medium-low heat, stirring constantly with a wooden spoon or heat-proof spatula, until the mixture thickens enough to coat the back of the spoon (about 170-175°F or 77-79°C). Do not let it boil.
Small tip: Running your finger across the back of the coated spoon should leave a clean line, indicating it’s thick enough.
-
Step 4: Chill the Base
Immediately remove the saucepan from the heat. If using a vanilla bean pod, remove and discard it. Pour the custard base through a fine-mesh sieve into a clean bowl to catch any bits of cooked egg. Cover the bowl with plastic wrap, pressing it directly onto the surface of the custard to prevent a skin from forming. Refrigerate for at least 4 hours, or preferably overnight, until thoroughly chilled.
Small tip: An ice bath can speed up the initial cooling process before transferring to the fridge. Place the bowl of custard into a larger bowl filled with ice and a little water.
-
Step 5: Churn the Ice Cream
Once the base is completely chilled, pour it into your ice cream maker’s frozen bowl. Churn according to the manufacturer’s instructions, usually for 20-30 minutes, until the ice cream is thick and resembles soft-serve consistency. It will still be quite soft at this stage.
Small tip: Ensure your ice cream maker bowl has been in the freezer for the recommended time (usually 24 hours) for optimal churning.
-
Step 6: Freeze to Firm
Transfer the soft ice cream to an airtight freezer-safe container. Press a piece of parchment paper or plastic wrap directly onto the surface of the ice cream to minimize ice crystal formation. Freeze for at least 2-4 hours, or until firm, before serving. This allows the ice cream to harden to a scoopable consistency.
Small tip: For the best texture, let the ice cream sit at room temperature for 5-10 minutes before scooping, especially if it’s been in the freezer for a long time.
Tips & Variations
- Gluten-Free Option: This Classic Vanilla Bean Ice Cream is naturally gluten-free! Enjoy it as is without any modifications.
- Vegan/Vegetarian Option: To make this recipe vegan, substitute the heavy cream with full-fat coconut cream and the whole milk with a plant-based milk like almond or oat milk. For the egg yolks, you can use 2 tablespoons of cornstarch or arrowroot powder mixed with a little cold plant milk to create a slurry, adding it to the warm cream mixture to thicken (ensure it cooks for a few minutes to activate the thickener).
- Nutrient-Rich Additions: While not typical for ice cream, you can boost the nutrient profile by stirring in finely chopped nuts (like almonds or walnuts) or seeds (chia or flax seeds) after churning. For a vitamin boost, swirl in a homemade berry puree (strawberries, raspberries) during the last few minutes of churning.
- Spicy Version: For a surprisingly delightful kick, add a tiny pinch (⅛ teaspoon) of cayenne pepper or a ¼ teaspoon of ground ginger or cardamom to the cream mixture along with the vanilla. It adds a subtle warmth that complements the sweet vanilla beautifully.
- Other Flavor Tips: Experiment with different extracts or add-ins! Swirl in a caramel sauce, chocolate fudge, or a fruit jam during the last few minutes of churning. You can also add chocolate chips, chopped cookies, or toasted coconut flakes for texture and flavor.
Nutritional Information
Approximate values per serving (based on 8 servings):
- Calories: 310 kcal
- Protein: 4g
- Carbohydrates: 25g
- Fat: 23g
Please note that these values are approximate and may vary depending on the exact ingredients and brands used.
Health Benefits
While ice cream is certainly a treat, our Classic Vanilla Bean Ice Cream contains ingredients with some beneficial properties. The dairy products, heavy cream and whole milk, are excellent sources of calcium, which is vital for strong bones and teeth. They also provide high-quality protein, essential for muscle repair and growth, and B vitamins like B2 and B12, which support energy metabolism.
Egg yolks contribute a wealth of nutrients. They are rich in choline, an important nutrient for brain health and liver function. Egg yolks also contain vitamins D and A, which support immune function and vision, respectively. Furthermore, they provide antioxidants like lutein and zeaxanthin, beneficial for eye health.
Real vanilla beans, the star of our ice cream, aren’t just for flavor. Vanilla contains antioxidants, which help protect your body’s cells from damage caused by free radicals. Some studies suggest vanilla may also have anti-inflammatory properties. Plus, its delightful aroma is often associated with feelings of comfort and relaxation!
Enjoying this homemade treat in moderation can be part of a balanced diet. The fats in the dairy provide energy and help with the absorption of fat-soluble vitamins. It’s a delicious way to incorporate some beneficial nutrients while satisfying your sweet tooth.
Serving Suggestions
- Classic Pairing: Serve a generous scoop alongside a warm slice of apple pie, cherry cobbler, or chocolate lava cake for an irresistible dessert experience.
- Fruity Delight: Top with fresh berries (strawberries, blueberries, raspberries) and a drizzle of honey or a sprinkle of toasted nuts for a lighter, refreshing treat.
- Sundae Bar: Create a fun sundae bar with hot fudge, caramel sauce, whipped cream, sprinkles, and chopped nuts for a customizable indulgence.
- Coffee Companion: Drop a scoop into a shot of espresso for a delicious Affogato, or blend it into a milkshake with a splash of coffee for a morning pick-me-up.
- Cookie Sandwich: Sandwich a scoop between two of your favorite cookies (chocolate chip, oatmeal, or snickerdoodle) for a delightful ice cream sandwich.
Storage Tips
Homemade Classic Vanilla Bean Ice Cream should be stored in an airtight freezer-safe container. It will keep well in the freezer for up to 2-3 weeks for optimal freshness and texture. Beyond that, it might start to develop ice crystals, though it will still be safe to eat. This ice cream is not meant to be refrigerated for long periods, as it will melt. It cannot be reheated; simply let it sit at room temperature for 5-10 minutes to soften slightly before scooping for the perfect consistency.
Conclusion
There